Carpet tile is a very versatile, easy-to-install floor covering. The pieces come in pre-cut squares, so there’s no need to bother with measuring a room for a piece of rolled carpet, trying to unroll the carpet, trying to install it while keeping it from rolling back up, measuring, cutting, fitting around doors…all the things that are involved with using broadloom carpet.
Most carpet tile is literally “peel and stick.” There’s a little more involved than that, but it’s still very easy to handle the carpet pieces. Even those that require applying adhesive to the sub-flooring are still fairly easy to install.
Carpet tile works well in children’s bedrooms, playrooms, family rooms and other areas of the house. You can choose from one color that matches an overall color scheme, or from several colors, which allow you to form patterns.
As mentioned earlier, installing carpet tile is fairly easy. Here’s how to do it:
1. Assemble your tools. You’ll need the following:
A tape measure and pencil
Tools for removing baseboards and doors, as well as a small saw for “notching” doorframes
A utility knife (“box cutter”), carpet trimmer tool or other cutting tool.
A chalk line or some string.
An adhesive spreader if your carpet doesn’t have “peel and stick” adhesive.
2. Remove baseboards and doors. This makes installation of carpet tile even easier. Then, make a “notch” in the door trim by sawing off a thin strip so that the carpet tile will fit snugly against the wall. Remove only enough wood to allow you to slip the edge of the carpet tile underneath.
3. Now, you’re ready to begin measuring the room. You may think you can just throw down carpet tile pieces indiscriminately, but the truth is you can’t. You have to do some measuring. It’s really simple, though.
* You just find the center of the room by measuring each wall in the room, from corner to corner, for its length. Record that number, and divide it by two.
* Then, find that number on the tape measure, and mark that spot on each wall. You want your mark to be very low on the wall as you’ll need to be able to get to it later in the measuring and laying process.
4. It’s time to determine where your first piece of carpet tile will go.
* If your carpet squares box does not give the dimensions of each square, you’ll need to determine that. Use your tape measure to find the width of the square and divide that number by two. Make a pencil mark at that point at the top of the carpet square.
* Now, take your piece of tile that you measured and place it on the wall. Line up your tile’s center mark with the wall’s center mark. Then, mark the wall at each of the tile’s corners.
* Do this for all four walls in the room. Don’t forget to make your marks low on the wall.
* After you’ve made all your marks, take a chalk line and snap it so that you have marks on the floor going from one wall to the other across the room and one wall to another down the length of the room. Or, take string and attach it to the marks on the walls. You want to have an “x” shape on the floor. The middle of the “x” is where you will lay your first carpet square.
5. You’re actually ready to lay your first square of carpet, but you’re not ready to install it permanently yet, so don’t put down any adhesive or remove any protective backing from “peel and stick” tile. Rather, take your first carpet square and position it so that the center of the square is on the center of your “x” mark.
* If you are working with only one color, go ahead and lay the remaining pieces, again without removing any backing or using any adhesive, working from the center piece of carpet out to the walls.
6. If you’re going to have a pattern, now is the time to lay it out. Take the remaining carpet squares, again with no adhesive applied or with the protective backing still in place, and lay them out in your desired pattern. Work from the center piece out towards the walls.
* It’s actually a good idea to lay a few pieces, then step back and look at your design to make sure it’s right. Because you haven’t permanently attached the squares yet, it’s easy to pick them up and rearrange them as needed.
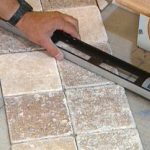
7. After all pieces have been laid, but again before permanently installing them, use the utility knife or carpet trimmer to trim the carpet around your door “notches”, along walls where they do not fit exactly, and other places that require trimming. Be careful to cut only as much as is needed to make it fit.
8. Now, you’re finally ready to install the carpet tiles permanently. Either peel off the protective backing and press the tiles down firmly, or apply adhesive and let it dry according to the manufacturer’s directions.
* If you are using adhesive, go ahead and apply enough for about three or four tiles. It can be drying as you lay other tiles. Just don’t do it too soon or it will dry before you’re ready to lay the other pieces. If you’re afraid this will happen, just apply adhesive and lay one piece at a time.
Once you have finished permanently installing the carpet tiles, give the squares some time to “set up” before walking on them or putting furniture or other items on them. Also, take care when putting things in the room not to tear the carpet squares or catch them to where they come “unstuck.”


 (1 rating, average rating is 4.00/5)


